
Titler Pro helps bring Photoshop and EPS files to life with its new import functionality. Move your multi-layered PSD designs from Photoshop to Adobe Premiere Pro or any other NLE in a matter of seconds. Discover how to import, animate, and impress in this short four-step tutorial.
Here’s how:
Step One:
Open Titler Pro and go to File and Import PSD.

Bonus Tip: This can also be done with (EPS) Vector files.
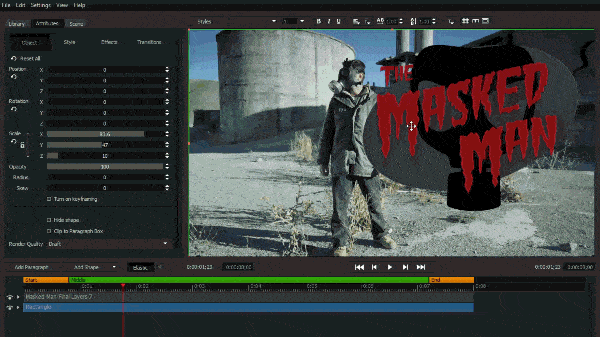
Step Two:
Move your Photoshop file to your desired location and adjust accordingly. You can rotate, scale or manipulate each individual layer however you like.
Step Three:
Under the Library tab, click on Transitions, then Animations, and hover over the options to see a preview before selecting.

Step Four:
After the animation is chosen, go under Attributes, select the Transitions tab and adjust the parameters to achieve the perfect look.

Now that you’ve learned the basics of importing Adobe Photoshop files into Titler Pro, you can breathe life and energy into any existing graphics, logos or titles.
Discover what you can achieve with PSD and EPS import as well as many more features available in NewBlue Titler Pro.