We’ve had so much fun at NAB this week that we’ve decided to create a Vegas style lower third template in Titler Pro.
Follow the steps below to create your own from scratch or hit the download link after the jump to download our project file.
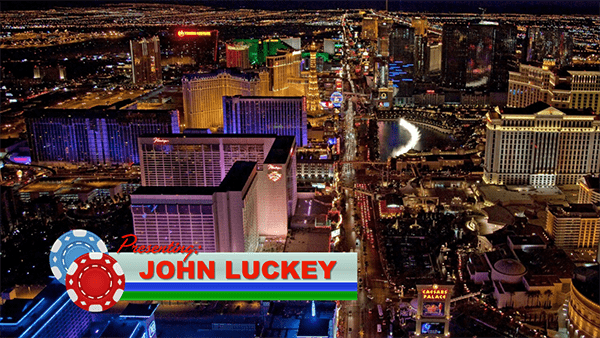
Let’s Get Started on the Vegas Style Lower Third
Assets: For this tutorial, you will need Titler Pro 4, the “Las Vegas Fabulous” font available for free via FontGeek and a Poker Chip Icon. We’re using the one featured on IconFinder.
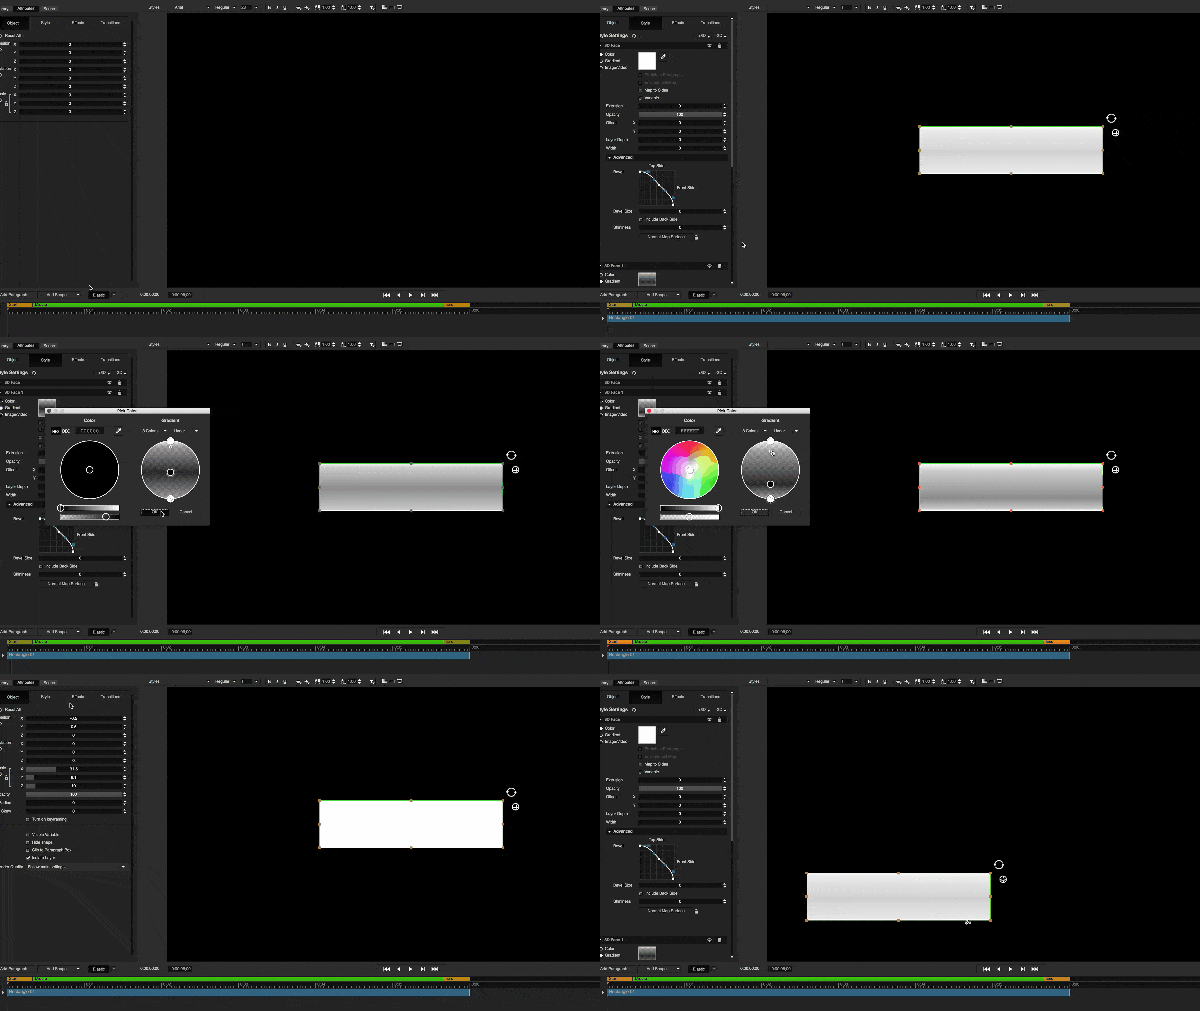
Step 1: Create a new rectangle, then position it on the lower left hand of the screen as shown. Next, add a Gloss Face to give it some depth. Now lower the Gloss Face’s opacity to 4.
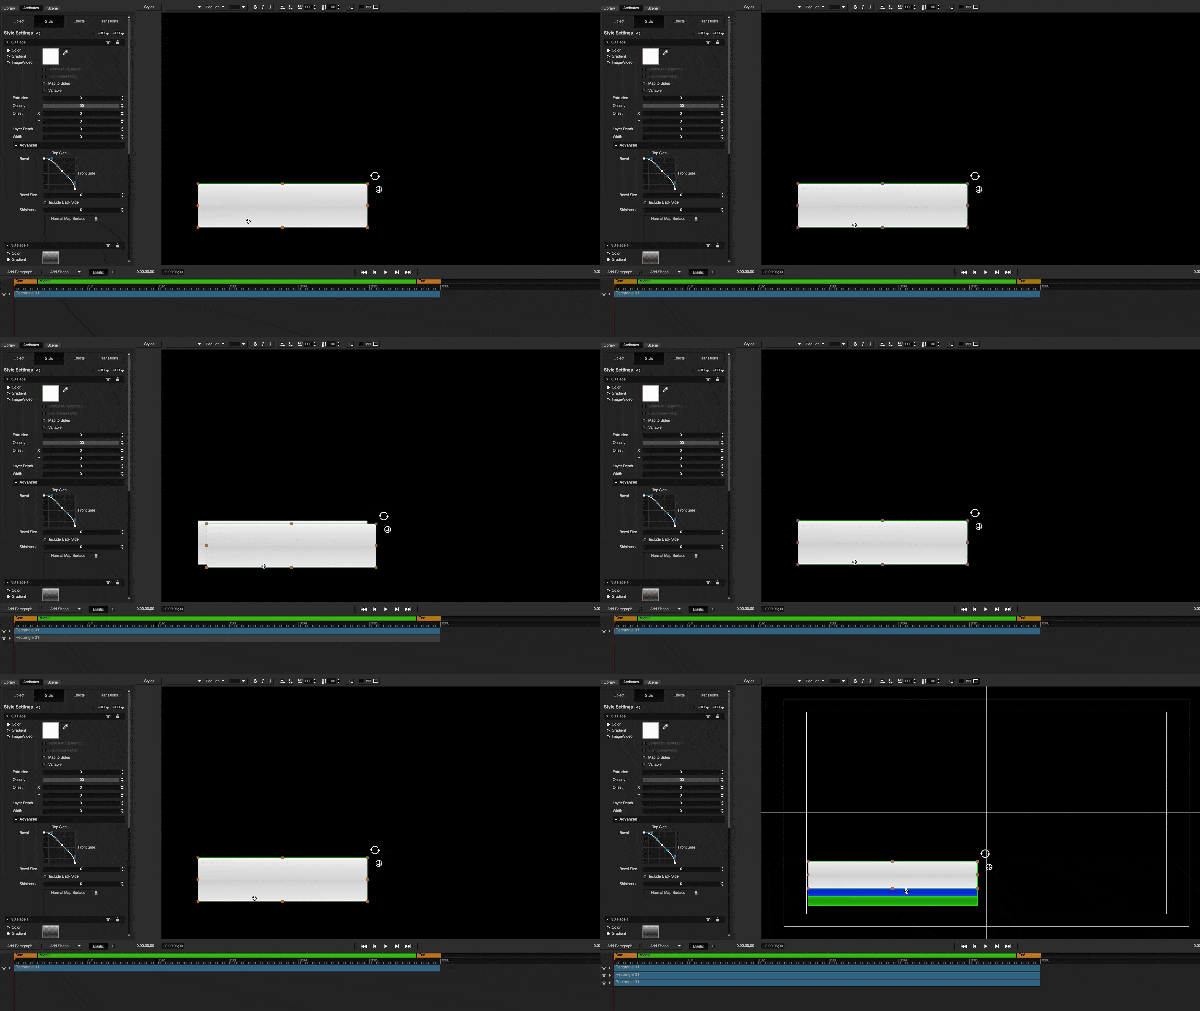
Step 2: Duplicate your rectangle twice. Now resize and position the shapes as shown below. Next you’ll want to change the color of the shapes to suit your style – here we’re going with an off-white, blue and green with ours. Pro Tip: Use Safe Margins to help with positioning.
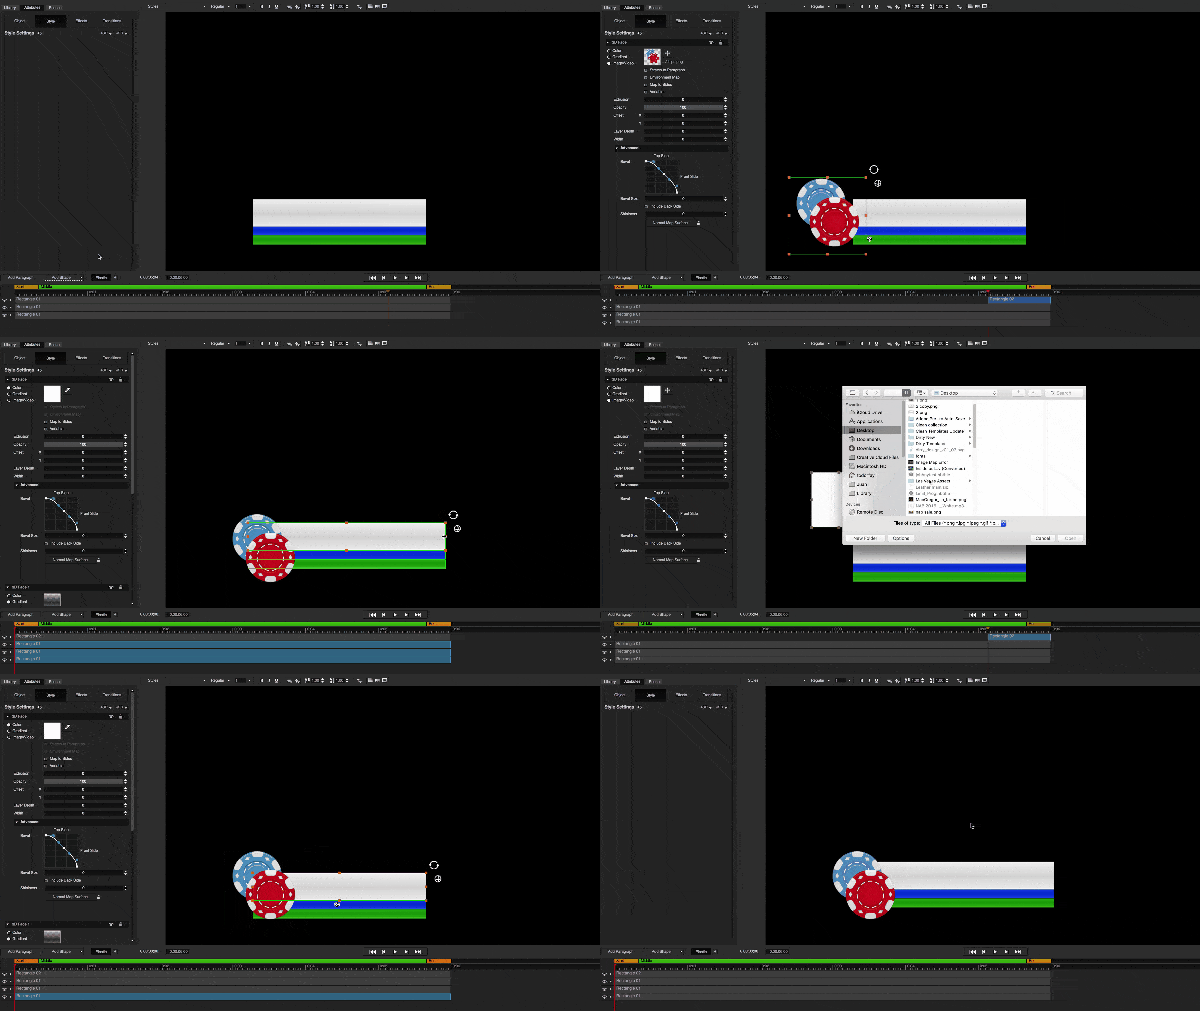
Step 3: Add another rectangle, then head over to the style tab and select “Image/Video” to map an image to the shape. Now select your Poker chips and adjust their size. As you can see, the lower third is starting to take shape. Take this opportunity to resize and reposition your objects.
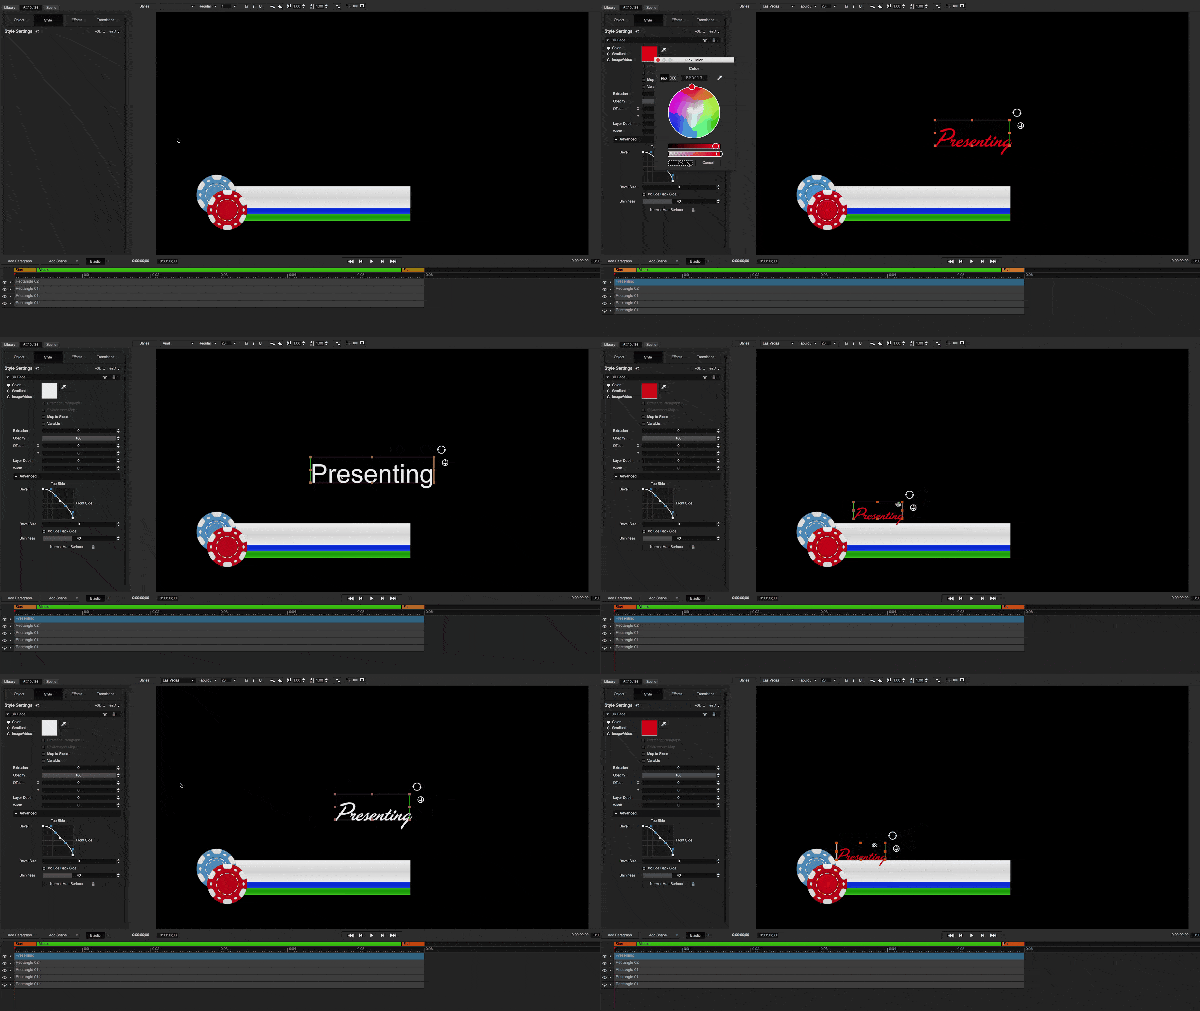
Step 4: Let’s bring in some text. To do that, click on the Add Paragraph Button and Type in the word “Presenting”. Now change the color to red and the font to “Las Vegas.” Add a drop shadow and position it in your lower third.
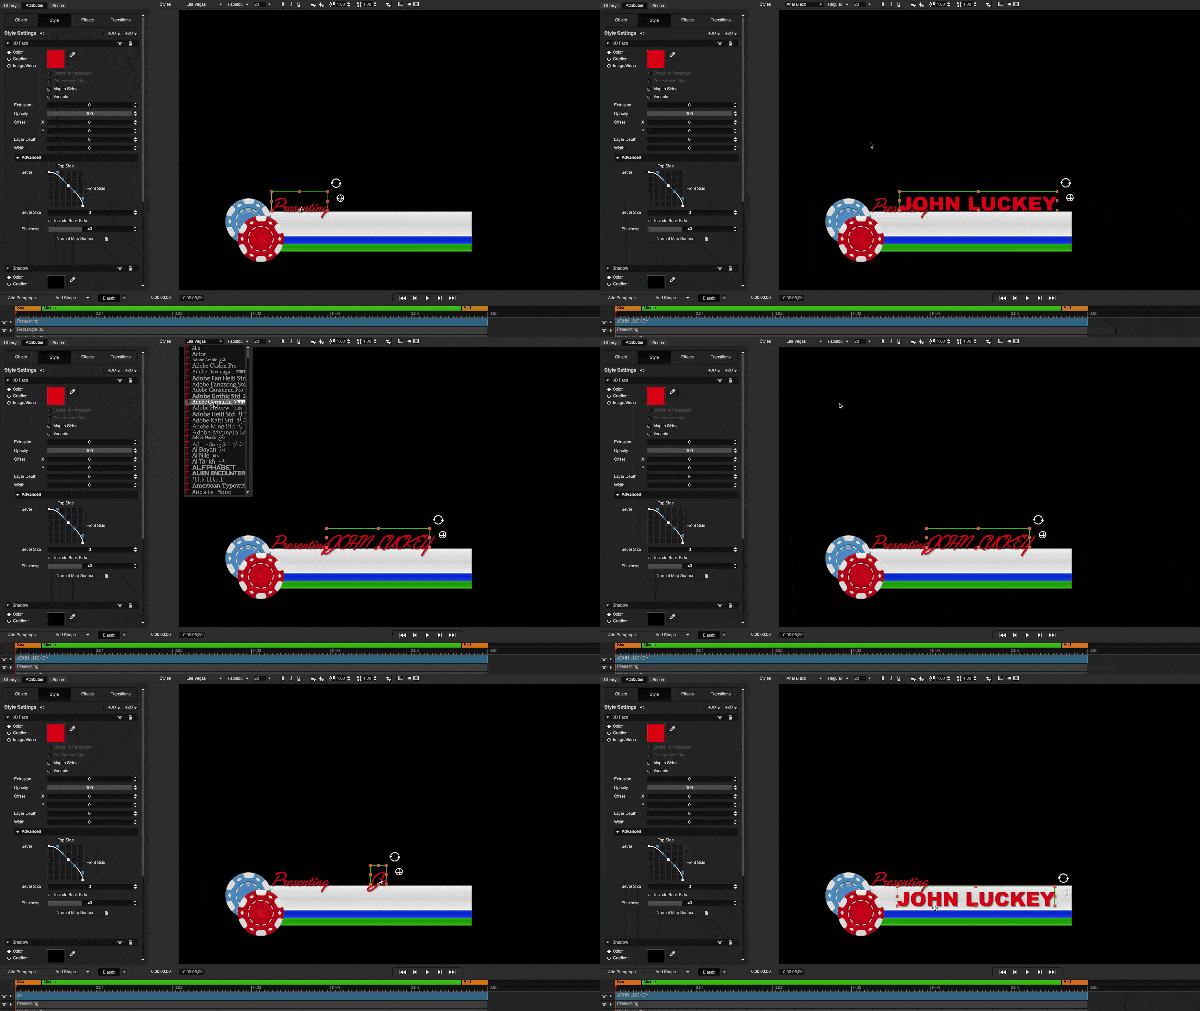
Step 5: Next you’ll want to duplicate the text paragraph to save some time. We’ll change the text to “John Luckey” and the font to Arial Black. And then reposition it into the first rectangle.
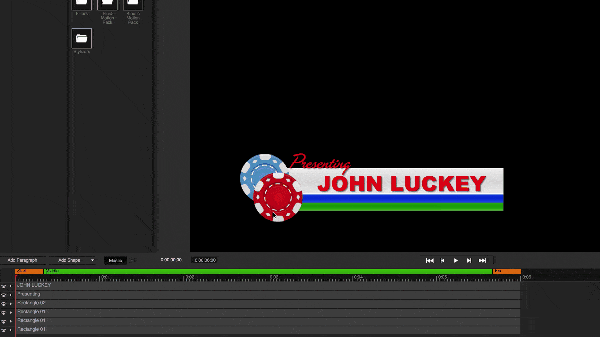
Step 6: Now the really fun part, it’s time to start animating the Vegas Style Lower Third! Let’s start with the poker chips. Go to the library, head over to Transitions and select the “Fly in” Transition. Now apply the “Spray Letters” preset to your poker chips. From here, you’ll want to adjust the length of the transition in the timeline.
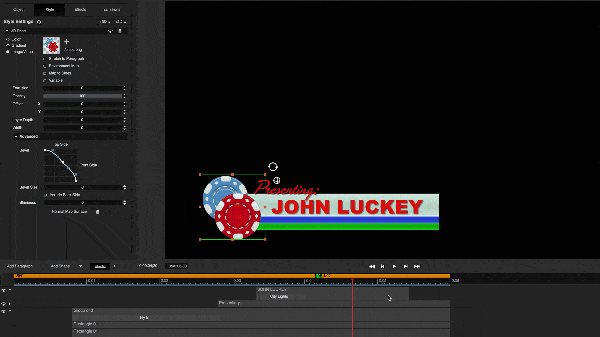
Step 7: Next, select your three colored rectangles by holding command/ctrl and clicking on multiple paragraphs (hint: this is a good shortcut to use in the future). Right-click and select Group, then head over to Transitions in the library once again and apply the “Fly in” transition. However, this time, apply the “Letters Right” preset.
Step 8: Now we want to add some flair to our text. To do that, we’ll go back to our Transitions and select the “City Lights” transition. From here, apply the “Flicker” preset to the “Presenting” text paragraph.
Step 9: Return to the City Lights transition one more time and apply the “Power On” preset to the “John Luckey” paragraph.
Step 10: To pull it all together, you’ll want to re-time your timeline to make sure all of your animations come in at the correct times. For some added effect, we’ll bring in some shadows to the remaining objects.
Ready to try your luck? Download Titler Pro and give it a spin!
