We live in the era of the hollywood movie reboot. Movies like IT, the upcoming Doctor Sleep and the infamous The Mummy have shown us that nothing is off limits.
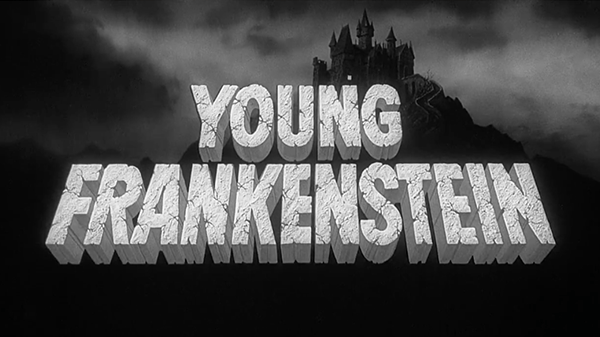
This got me thinking about some of my favorite scary and not-so scary movies to watch in the Halloween season. This is when I rediscovered one of my favorite movies to watch in October, Young Frankenstein.
Although shot in the 70’s, well into the era of color film, Mel Brooks made the decision to emulate the classic horror film look and feel of the classic horror movies of the 1930s.
This got me thinking, what if I wanted to make a modern version of the classic title screen?
Taking a look at the film’s title sequence quickly gives me a chilling feeling of excitement, so I decided to take up the challenge to create my own spooktacular interpretation.
Let’s get Started
Much like Dr. Frankenstein’s ghoulish creature, our own creation needs a couple of parts in order to be put together.
First off, we need the iconic font, an adequate background and a nice rolling fog to set the mood.
Step 1: Prep Work
Let’s fire up Titler Pro 7 and get to work. One of the key elements found in the original is the looming castle in the background. First off I want to import my background image. I’m going to go to File> Import Image and select my spooky castle image.
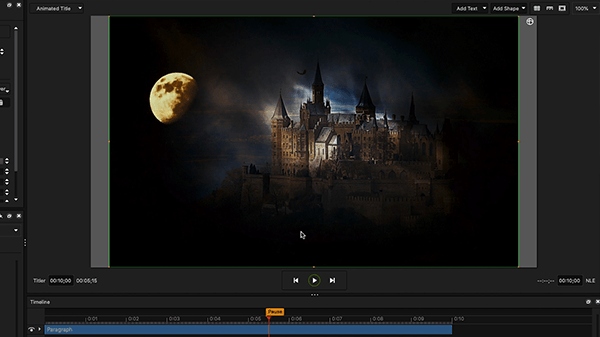
Next, I’m going to position and scale it so it fills up most of the screen.
Step 2: Set the Mood
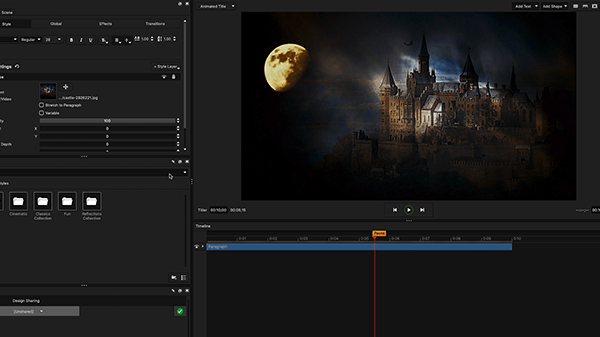
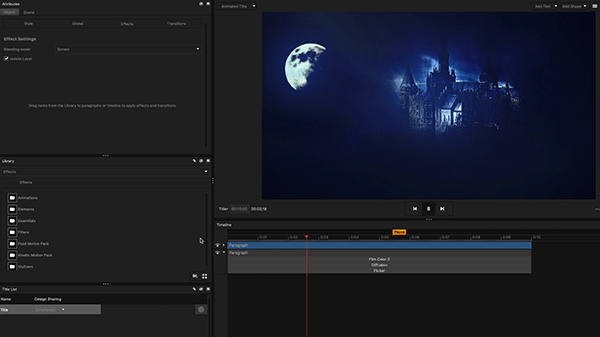
This is where the fun begins. Let’s head over to the Library, browse effects and head on over to Filters. I’m thinking this castle image is nice, but it can stand to be a little more ominous. Let’s open the Film Color 2 folder and select the Ektachrome filter.
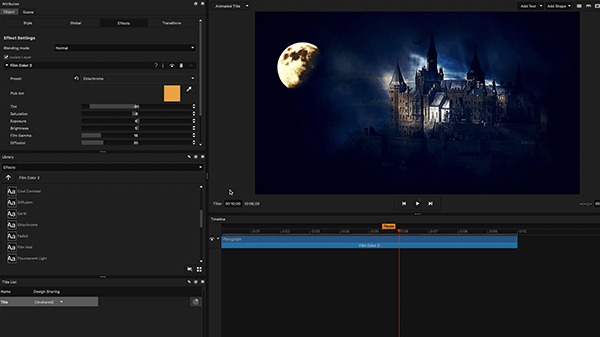
You’ll see it immediately gives it a bluish tint. In this instance I want to make it even darker, so I will set the tint to -100, exposure to -7, brightness to -16. I’m also going to use the built-in vignette effect to increase the size and strength of the vignetting.
Our background is starting to take shape, but I really want some of that moonlight to shine through the darkness. Let’s browse over to Filters once again and go into the Diffusion folder. Select and apply the Cyan Spirit preset, you’ll immediately see some beautiful blue light poke through. The only tweak I’m going to make to this effect is decrease the Blend to 60. That’s looking more like it!

Next I’m going back into the Effects library, head to my Stylizers folder this time, and select the Flicker folder. From here I’m going to apply the Water preset to bring in some nice flickering light.
Step 3: Adding Some Ambiance
This one’s pretty simple. We want to add some depth to our title, and fog horror’s best friend. I’m going to go to File>Import Video, select my fog video and scale it up to fit my composition.
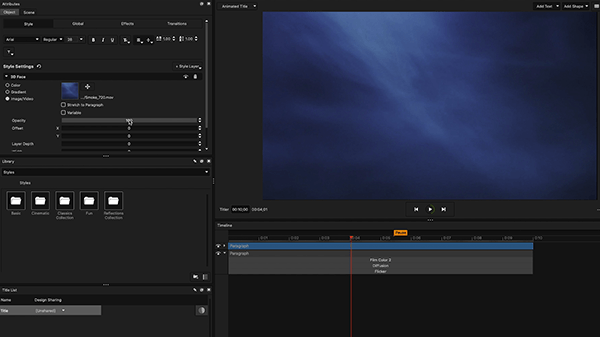
From here, I’m going to lower the opacity of the video from the Style layer down to 26 and change the Blend Mode under the Effects tab to Screen to instantly create some atmosphere.
Step 4: Selecting Your Font
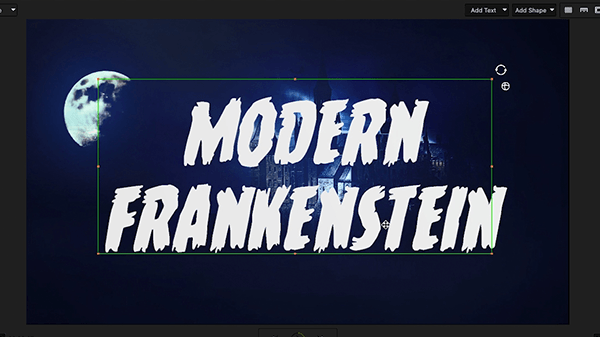
Once you’ve downloaded and installed your font, you can click on the Add Text button in the workspace and select Static Text. From here, click on the text paragraph and change the font to Young Frankenstein Rotalic, this will give us a nice, italicized version of the classic font.
Type in your text, and center it using the text tools, You can also adjust the leading to get the words closer together.
Scale up the title to a decent size and you’re ready to move on.
Step 5: Transforming Your Text
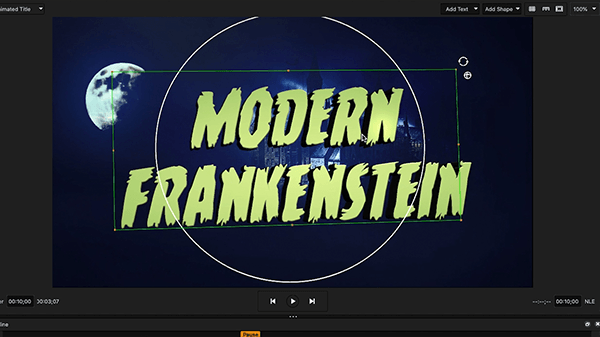
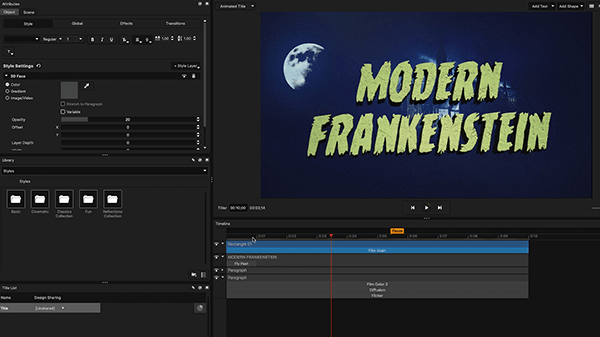
Once you’ve got your text paragraph ready to go, it’s time to stylize, color and animate it. The first thing I want to do is give it a green glow, to achieve this I’m going to click on the Gradient option in the Style layer and select an in-to-out, 2-color gradient. This will allow me to choose two colors and set the points where I want my gradient to affect my text.
I’m going with two shades of green, a darker green (HEX B1D781) and a yellow-green (HEX EBFEAB) This looks good, but I want to select the “Stretch to paragraph” checkbox to keep the brighter part in the middle of my text.
While I’m here, I’m going to open the 3D Controls drop-down, select the third bevel type and set the bevel size to .1 just to give the title a bit more definition.

Note: Feel free to play with colors and gradients to find what works for you
Next, I want to add some depth to my title, so I’m going to add a 3D face, set the color to black, adjust the Layer Depth of this face to -1 and set the Extrusion to 11 under 3D controls. This will come in handy when animating the title and moving it in 3D space.
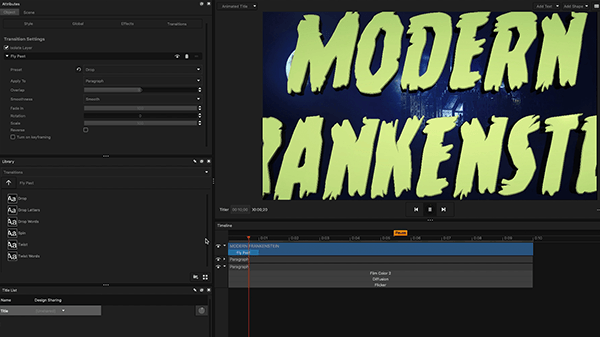
Use the on-screen globe handle in the workspace to slightly tilt your title. This will get you closer to emulating some of the original title’s perspective. You can also use the Transform sliders under the Global tab. My rotation parameters are; X: -10.1, :Y 6.3 and Z: 1.8.
You can now clearly see the result of the Extrusion we added earlier. Finally, I’m going to go into the Transitions Library, look for the Fly Past transition and sect the Drop preset. This will give the title an eerie fly-in effect.
You may have noticed we get a bit of a shine on our text, especially if we rotate it. To fix this and add a more adequate texture to our text, I’m going to add a Normal Map. This will affect the way that light interacts with our title as if our title’s face was made of stone.
To do this, click on the text paragraph, head over to the 3D face> 3D Controls drop-down and click on the Normal Map Surface button. Look for the Cherry Bark texture and apply it to your text. You should immediately see a nice stone-like texture that interacts with light the way real stone or wood would interact.
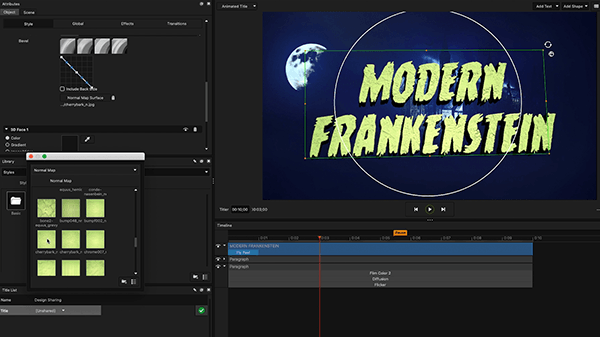
Normal Mapping Textures is a great way to give your titles a more natural and organic look, feel free to experiment with them in your future projects.
We’re almost there!
Step 6: Get a Film Look
Our title is looking pretty good, but I think it could look a little bit more authentic. Let’s add some film grain. I’m going to teach you a nice trick to add some great-looking film grain over your entire title right inside Titler Pro 7.
I’m going to add a new rectangle, scale it to fit my composition and select a grey color (HEX 4C4C4C). Then, I’ll head over to the Library>Effects> Filters folder and select the Film Grain effect. For this title I want to use the Chemical Crunch preset.
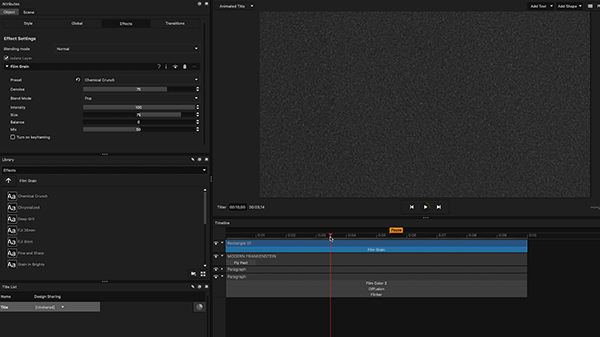
That’s some nice looking film grain but we’re not done yet. The last step is to lower this paragraph’s opacity down to 20 and… it’s alive!
Step 7: Make Some Thunder
The original title has some flicker effects in its letters, but for this interpretation, I want it to be more of a full-screen thunder effect, so I’m going to add a couple of white rectangles, scale them up to full screen and shorten them to be just about a second long each.
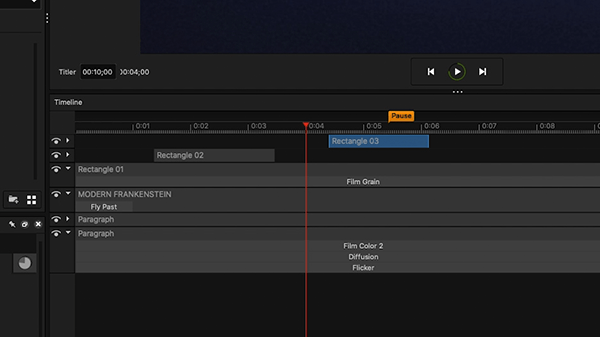
I’m gonna head over to the Library> Transitions> City Lights folder and apply the Flicker preset as both in and out transitions to both of my new rectangles. You should now have some nice flickering lighting.

Step 8: The Finishing Touch
Lastly, I’m going to do some light retiming, I’m going to trim my title to start right when one of my lighting paragraphs flickers so that it looks like it pops in as lightning strikes.
From here, you can do some light tweaking and scaling of your paragraphs to make sure you get everything just right.

The End?
I’m going to take this title back into Premiere Pro, add some sounds and some spooky clips to create a full title sequence.
Now we have a nice modern title inspired by a true film classic, but like any classic monster, there are many iterations, interpretations and reincarnations that will pop up again and again.
Feel free to mix and match extra filters, more video clips and extra elements to spice things up.
That’s it! You now have the tools to revive the classics over and over again.
See more of what Titler Pro can do at: https://www.newbluefx.com/titling/titler-pro

Titler Pro 7
Titler Pro 7 is the easiest way to create stunning titles across all editing platforms.